Don’t buy Angelus pain’t on Amazon, it’s like $6.99 an ounce. Buy it direct from their online store the poster above linked, the single ounce bottles are $2.95 there. Also, a little goes a long way, unless you have something HUGE to paint, you can probably do it with a small bottle. I barely dented the one I got doing all the black on this;
Angelus is amazing! Just leave a little shipping time from their site—my brother and I customize sneakers with it, and they work well even on everyday wear items
ok please note i had no idea what i was doing for any of this and theres probably a much better way to construct a base BUT this is what…. ended up happening
the vague shape of it is getting there … . .
needs more bands
MORE BANDS
becoming a flat onion
the top is removed so i can get inside of it
… and then a band of cardboard is placed on the inside to support it ( its standing !! )
the bands are cut on the places where they jut out and then overlapped and taped, so the shape is smoother but its STILL an onion
so i cut the whole damn thing in half and added a big band of cardboard in the middle to lengthen it out. the Orb is being born
its rounded out a little bit more on the sides and then the mouth is cut out
FABRIC
F A B R I C ( this is the point in the game where my gluegun stopped working, and so everything from this point on is glued by me heating the sticks over a candle flame. nice
the seams on the fabric are cut and glued into place ( and hand stitched in a lotta places and a lot of em look, Really bad in the back h hah HA ) and the teeth ( fleece, cardboard to keep em flat, and a little bit of stuffing ) are thrown in the mouth
tongue cuttin
handstitched the seams on the tongue, got the base for it ready and the eyes cut out
the EYES ( cardboard with white on one side, black on the other, and a little thin strip of black going along the edge ) ( also the pupils arent glued down yet hey )
EYES
TONGUE
THERE THEY ARE
tulle time, so much goddamn tulle
SO much of it just everywhere on the back its a mess, the back looks like an awful grape but it doesnt matter its the BACK
heres the Looking Hole ( theres black mesh netting over the top ) – the little pink eye details are also in
and then here it is, this Mess ( tights and boots both are probably gonna change but Oh Well ) i dont know what the tongue was doing so crooked in these shots but its TOO LATE
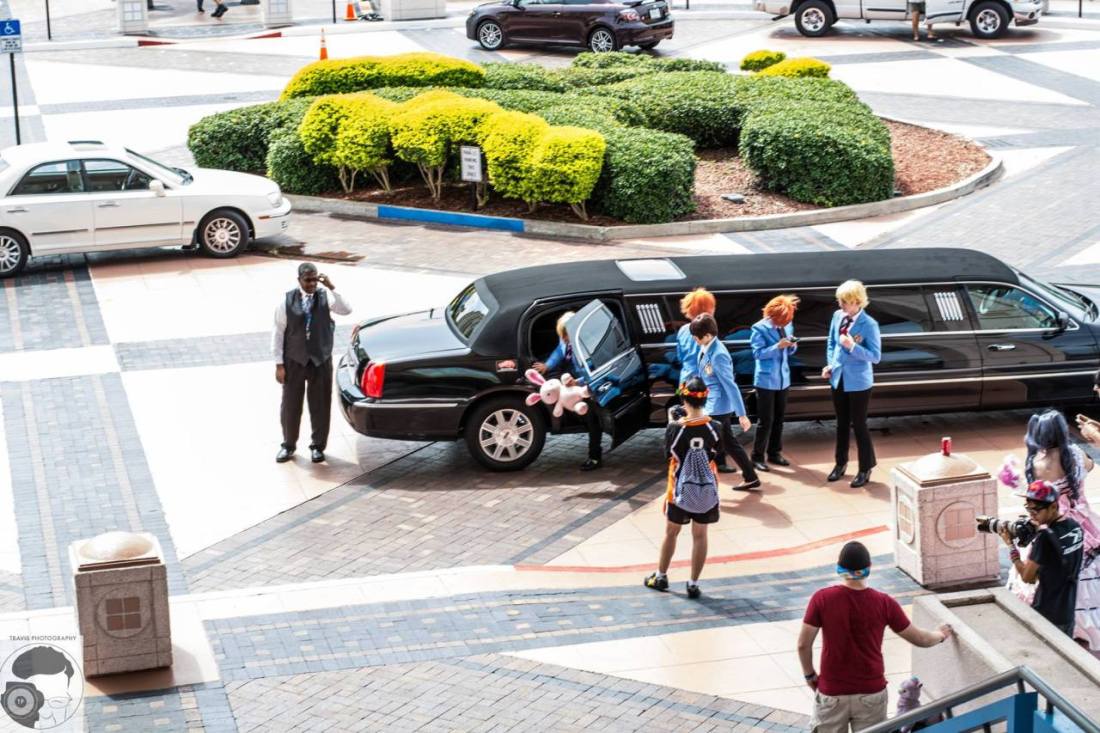
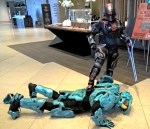
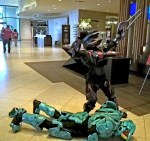
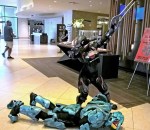
Some photos of my kenku costume at Anthrocon 2016, taken by @adammillerstudio! Oh boy did I ever have a lot of fun! The other raven in these photos is @qawstume and the snowy owl we are mobbing is @crystumes, who made both of the blanks that we used for our masks.
FOR REAL, I JUST WATCHED A VIDEO OF A GIRL DRESSING UP AS ANNA AND SHE WENT TO HER LOCAL MALL
SHE WENT INTO THE DISNEY STORE
WHEN A LITTLE GIRL CAME UP TO HER AND TRIED TO TALK TO HER
THE COSPLAYER WALKED AWAY
AND LOOKED AT THE LITTLE GIRL LIKE SHE WAS NUTS
THAT IS HORRIBLE
I USED TO DRESS UP AS SNOW WHITE FOR CHARITY EVENTS WITH CHILDREN
I CANNOT TELL YOU HOW AWKWARD IT WAS WHEN OUR ELSA DID NOT TALK TO CHILDREN
SHE WAS NOT INTERESTED IN TALKING OR BEING AROUND THE KIDS AND THAT MAKES THE KIDS UNCOMFORTABLE!!!
IF YOU ARE COSPLAYING A CHARACTER THAT IS POPULAR AMONG CHILDREN, PLEASE PLEASE PLEASE BE NICE TO KIDS
TO THEM, THEY ARE ACTUALLY MEETING THIS CHARACTER THAT THEY LOVE OR KNOW
IT IS UP TO YOU TO NOT BE A DICK
You also gotta know that if you’re going somewhere where there will be children and you’re in a costume even slightly similar to a Disney character they will think you are that character.
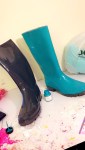
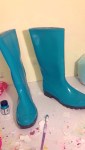
My hair is dyed white and at last year’s Ren Fest I was dressed as a water nymph. So i was in all blue, with glittery blue heeled boots on. Personally, I would have never thought that I looked like Elsa. I had leggings on, not a dress. And no ice themed anything. But that didn’t stop the sweetest little princess from asking me if I was Elsa.
I’ll admit that I was thrown for a loop, since I thought I was a pretty convincing mermaid on land with my scale print leggings. But I’m not a dick so I quickly recovered and said I was her cousin. Kids are more than happy to accept that and she smiled then shyly ran back to her mom to tell her she met Elsa’s cousin.
If you’re in a glittery costume of any sort, in a place where children will be, be prepared to be nice to them. Otherwise you’re just a jerk. No one likes jerks.
Don’t be a dick.
Seriously. If I go anywhere in ANY costume, no matter if I’m a princess, hero, or villain, I’m nice to the kids. They just wanna play!
I don’t even like kids, but one of the most rewarding cosplay moments I’ve had was interacting with littluns as Rose Quartz. Every kid got a hug if their parents said it was okay. Every kid got told that they were very special because they’re a human being. I’m looking forward to doing it again this year, because giving a kid a moment of genuine magic really is something else. It doesn’t hurt you to smile at a child.
When I cosplay Pearl I have precious little ones come up to me and you better bet I goof with them about how gross eating is or how loud amethyst is (and pretend to get a sooooo offended when they say someone else is their favorite gem)
You are making magic real for those kids in that moment and if you aren’t prepared for that, maybe think twice before cosplaying that character. I had a child completely frozen in disbelief and joy over seeing me, a character from a show they love, that’s power you have to wield responsibly.
It’s not just with popular lady characters. My best little-kid-cosplay-moment was when I was cosplaying Thor (not lady Thor from the comics, my own version of genderbent MCU Thor). I was walking through the dealer’s hall and suddenly saw a gaggle of Tiny Avengers in those Walmart costumes barrelling towards me. They crowded me in excitement and asked where Loki was because they wanted to find him and beat him up (I told them to give him an extra punch from me when they found him), then all six tried to crawl into my lap when I said yes to a photo. Cutest thing ever.
BE NICE TO KIDS WHEN YOU’RE IN COSTUME.
//If you’re going to be cosplaying -any- character that children will recognize, BE NICE TO KIDS!! To them, you -are- that character. And you have no right, what so ever, to destroy the illusion of what, to them, is a magical moment.
When I cosplay Batman, to little kids, I am Batman. And it is such an amazing experience to have kids run up to me and want a hug, and tell me about how when they grow up they want to fight bad guys too. I can’t fathom someone being so rude as to ignore them.
I have a friend who cosplays Han Solo, and a little girl was so excited to see him that when he knelt down to talk to her, she hugged onto him and didn’t want to let go for ten minutes.
Also, remember IF THERE IS A LOST CHILD AT A CONVENTION, AND YOU ARE COSPLAYING A PRINCESS OR A SUPER HERO, THE CHILD WILL GO TO YOU FOR HELP LONG BEFORE THEY THINK TO APPROACH A SECURITY OFFICER!!! You have a duty to help that child! Help them calm down, escort them to the nearest safe zone, and inform a security officer that the child has misplaced their parents/guardians. -Never- use the term ‘lost child’ in front of the kid, it’s the parents who wandered off and got lost, not the child.
Read this, then read it again.
this is why, no matter who I cosplay, I’m in character to everyone I’ll meet, whether they’re adults, kids, or teens like me. super important, honestly
Got a cosplay idea but the character has lots of arm (or leg) tattoos? Don’t feel like painting on yourself with body paints or hunting down that horrendously expensive temporary tattoo paper? Here’s a quick tutorial for making tattoo sleeves using nylons and sharpie markers!
Upsides:
– Supplies are cheap! You may even have many or all the supplies you need right at home.
– Quick and not very messy! No paint is involved, and sharpie marker dries instantly.
– Easy! Great artistic skill not required.
– They move with your skin! People have legit thought these were real tattoos. From a distance, yes, but I had guys at cons with actual ink on their arms come over to compliment on my full (fake) sleeves.
– You get to eat pringles! More on that later.
Downsides:
– They are delicate. Nylons get holes in them super easy and forearms run into stuff, lean against things, and generally make it hard for the sleeves to survive. But if you only need them for a weekend, that’s ok.
– I haven’t experimented too much, but unfortunately this technique probably doesn’t work for wearers with darker skin tones. Sharpie ink is transparent, so any color it rests on just multiplies and the tattoo won’t show up very well. You’ll want to go the fabric paint or body paint route to get the best bold, bright tats.
– Can’t do white sections, because sharpie ink is transparent and doesn’t come in white. I leave them blank and they read OK, but the white areas will always be pink, tan, brown, etc. unless you dab in a little fabric paint, which will not be covered in this tutorial.
– Sharpie is supposed to be permanent marker, but on skin…it’s not. The ink will most likely wear off onto adjacent clothes. Not that big of a deal for me, as I tend to wear my tats with white shirts that can be bleached, but other shirts may not survive as well.
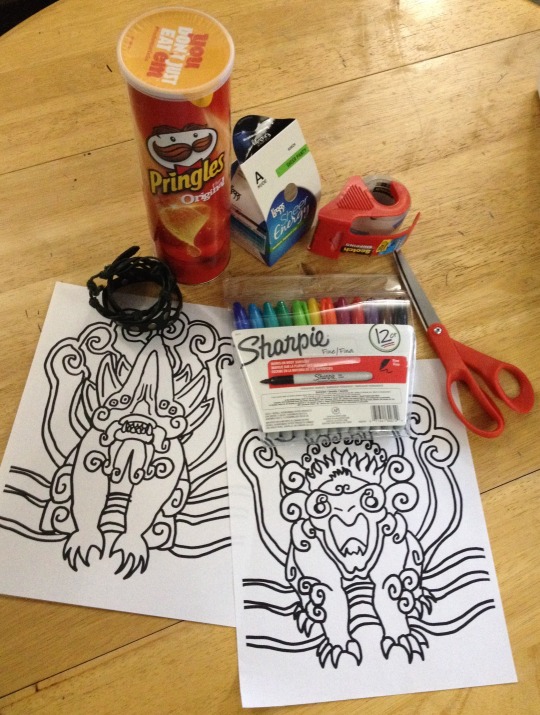
OK, let’s go! Here are your supplies:
You’ll need a pair of nylons, scissors, tape, a set of sharpies, your designs printed out on 8.5 x 11 paper, some bracelets, and a can of Pringles. You can use any design you want, of course, but Here is the link to these fine Newt Kaiju tattoo designs.
If your nylons have an undies part, cut the legs off and wear the undies on your head for the rest of the tutorial, if desired. Put the legs on your arm like so, and cut the toes off so you can slip your hand through. You can cut some of the top of the sleeve off as well, but don’t cut too much because you can’t put it back on if your sleeves are too short.
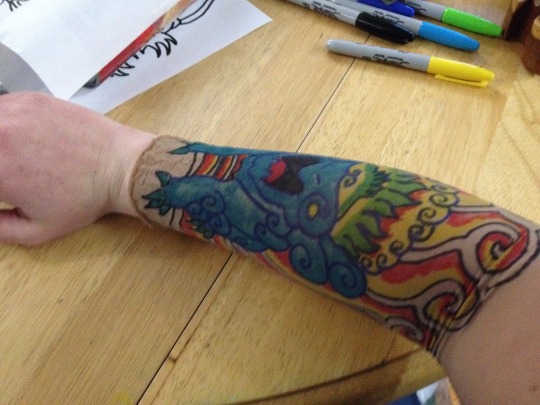
Here are my creepy sleeves. Now for the pringles.
Tape your design template to the Pringles can. It doesn’t reach all the way around but eh. The Pringles can gives you a nice stable surface to draw on that is roughly the shape and size of an arm. It’s a little short, so just roll up the rest of the nylon above the workspace and adjust both template and nylon down when you get to working on that part of the sleeve.
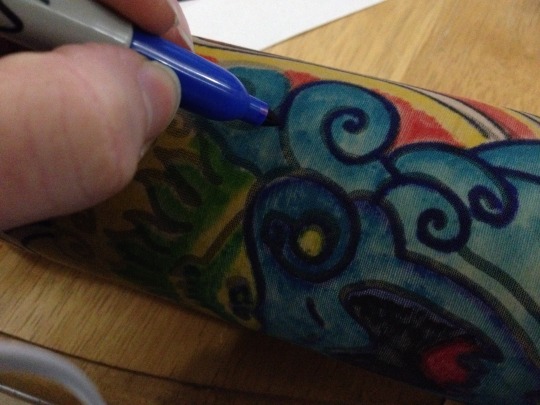
Color with the markers! I recommend doing the colored areas first and then doing the black outlines on top of it, to avoid the black ink contaminating the ink pads of the lighter markers. Remember how that always happens to the yellow ones? Eww. Nylons are thin and slide around a bit, so it’s best to use short strokes and dotting to get the ink on.
Take the template off the Pringles tube, flip the paper to the blank side and put it back on again. The paper collects the extra ink, so it’s hard to see any missed spots. Now you can see any bits you may have missed. Fill them in for completion. Also, the paper doesn’t manage to wrap all the way around the Pringles can, so now is the time to free-hand a bit of the design where the template doesn’t reach. For Newt tattoos, that’s the back of the arm.
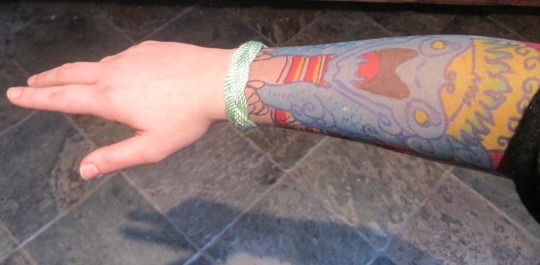
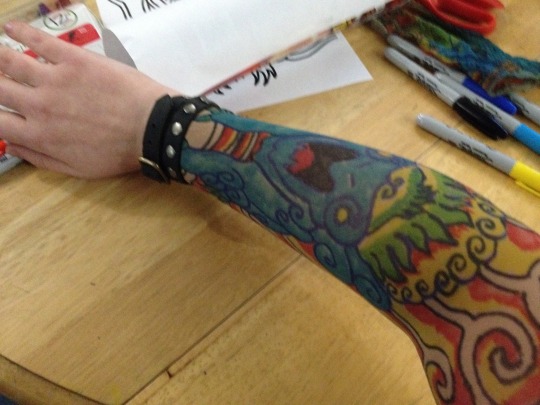
When you’re all done coloring, put them on!
There’s a rough end to the tattoo right at the wrist, of course. Disguise where the sleeve ends and your skin begins with some pretty bracelets:
There we are, much better!
Now…you’re done! Have some Pringles!
SLAMS THE REBLOG BUTTON
from a tattooist perspective: use the navy sharpie not the black or blue for your lines, they will look like healed black ink.
This is amazing. Particularly “if your nylons have an undies part, cut the legs off and wear the undies on your head for the rest of the tutorial, if desired.”