Don’t buy Angelus pain’t on Amazon, it’s like $6.99 an ounce. Buy it direct from their online store the poster above linked, the single ounce bottles are $2.95 there. Also, a little goes a long way, unless you have something HUGE to paint, you can probably do it with a small bottle. I barely dented the one I got doing all the black on this;
Angelus is amazing! Just leave a little shipping time from their site—my brother and I customize sneakers with it, and they work well even on everyday wear items
Grab some aluminum foil and crumble it into a ball. Not too tight of a ball though! The next step is almost impossible if you do.
Next, un-crumple the ball. Flatten it out into one layer. It’s fine if there are a few holes.
Place it on top of your foam.
Take your iron and firmly press it on the foam and aluminum. My iron was set to 3 (polyester) but the correct temperature may be different for other irons. Just remember not to use steam! Before doing this on a large piece, be sure to experiment and figure out what the best temperature and what the best pressure is. On larger pieces, you’ll have to move the aluminum around a lot. It’s not a quick process.
Now you’ve got this crinkly affect on the foam. Next is painting!
Grab you’re brush, black paint, and a dish with some water. The idea is to dilute the black paint enough so that when you apply it the paint will seep into the divets the aluminum created.
Once the watery paint is applied, wipe it off with a paper towel. Continue to do this for your whole piece of foam.
Now here’s an optional step (of which I haven’t done myself but I’ve known others who have):
Grab the light brown paint and, without diluting it, paint it on. It’s best to use a coarse brush in this case and to try to keep it out of the divets. Wipe some of the paint off.
Remember, imperfections are always good! Uneven paint isn’t necessarily bad so just experiment with it.
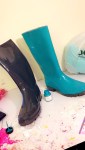
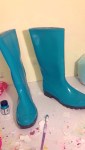
Here’s an example of a bracer I did with this method. The first two pictures are an example of the foam I began with and the rest show the end result. I hope this helps you guys out!
Alright shitstains listen up because I just found god in a bottle.
If you’re a nerd like me your body’s probably riddled with a few nerd tattoos yeah? Some of ‘em in some pretty obvious places? Maybe you work in a professional environment that frowns upon body ink? Maybe you’re a cosplayer and you have some revealing outfits that you need to cover up for, yeah? Tattoos that you can’t afford that $30 Kat Von D Tattoo cover up because you’re a cheap broke shit?
Story of my life bud.
Now I have a pretty obvious Squad 11 tattoo, because I’m a Bleach nerd and Zaraki Kenpachi is my husband, and honestly it’s difficult to hide it in some of my cosplays because it’s bright and black and right smack dab on my shoulder. Poor planning on my part but hey, squad represent.
You see that glorious miracle up there? That’s Mehron Tattoo Cover. You see those pictures underneath it? Tattoo? What fucking tattoo?! It’s gone!!!! Vamoosed!!! Like I never got the ink in the first place!!!!
This shit is durable, and I mean durable. It’s completely waterproof and that first picture of my tattoo is actually what it looked like after scrubbing at it with two makeup wipes. TWO. It’s not going anywhere
And the best part?
IT COMES IN DIFFERENT SKINTONES. BAM. WHAT.
I mean it’s not phenomenal but hey at least it’s not just “pale as fuck”.
Yeah. $12. Not $30. Because $12 is much more reasonable than $30.
As for size reference, that’s how big it is in that third picture right there. It’s honestly the best investment I could have made and everybody should know about it.
Go forth and conquer with your newfound knowledge. You’re all welcome.
As someone who used to chair a stage makeup department, Mehron and Ben Nye are going to be cheaper and better than whatever concealer/orange eye shadow/green lipstick whatever weird tutorial you found or expensive-ass luxury concealer.
Why you ask?
Because Mehron and Ben Nye are stage makeup. They’re meant to give thick, full coverage in one layer that can stand up to cameras and stage lights. Blend it out, powder it, and you’ll never look back. Plus it’s cheap enough that you can buy 2 and mix the perfect shade.
This will work on scars, too.
Just an FYI for folks I know who may want to cover for cosplays, work, or personal reasons.
Honestly this would be a life saver for people with tats stuck looking for jobs in places that frown on them.
I’ve watched people not get jobs at places I work even though their personalities and experience levels were exactly what we were looking for purely because of personal adornment (tattoos, piercings, etc.). So to anyone who might need a product like this, I hope you see this post.
Reblogging in case anyone wants to know how to hide scars specifically.
Got a cosplay idea but the character has lots of arm (or leg) tattoos? Don’t feel like painting on yourself with body paints or hunting down that horrendously expensive temporary tattoo paper? Here’s a quick tutorial for making tattoo sleeves using nylons and sharpie markers!
Upsides:
– Supplies are cheap! You may even have many or all the supplies you need right at home.
– Quick and not very messy! No paint is involved, and sharpie marker dries instantly.
– Easy! Great artistic skill not required.
– They move with your skin! People have legit thought these were real tattoos. From a distance, yes, but I had guys at cons with actual ink on their arms come over to compliment on my full (fake) sleeves.
– You get to eat pringles! More on that later.
Downsides:
– They are delicate. Nylons get holes in them super easy and forearms run into stuff, lean against things, and generally make it hard for the sleeves to survive. But if you only need them for a weekend, that’s ok.
– I haven’t experimented too much, but unfortunately this technique probably doesn’t work for wearers with darker skin tones. Sharpie ink is transparent, so any color it rests on just multiplies and the tattoo won’t show up very well. You’ll want to go the fabric paint or body paint route to get the best bold, bright tats.
– Can’t do white sections, because sharpie ink is transparent and doesn’t come in white. I leave them blank and they read OK, but the white areas will always be pink, tan, brown, etc. unless you dab in a little fabric paint, which will not be covered in this tutorial.
– Sharpie is supposed to be permanent marker, but on skin…it’s not. The ink will most likely wear off onto adjacent clothes. Not that big of a deal for me, as I tend to wear my tats with white shirts that can be bleached, but other shirts may not survive as well.
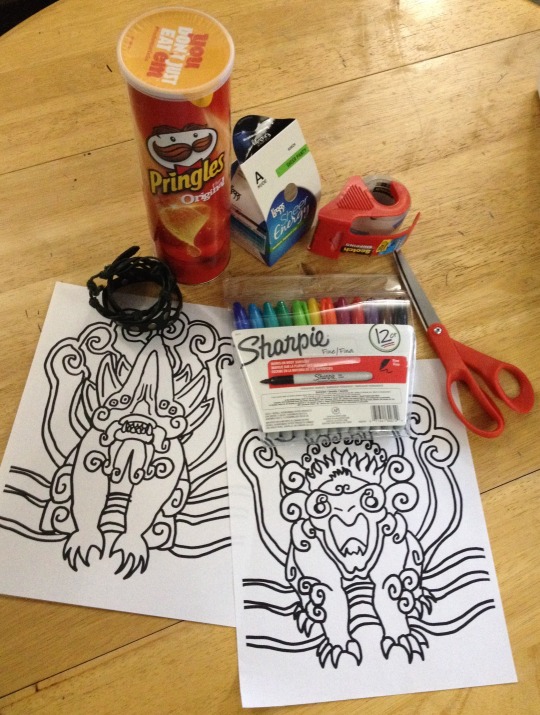
OK, let’s go! Here are your supplies:
You’ll need a pair of nylons, scissors, tape, a set of sharpies, your designs printed out on 8.5 x 11 paper, some bracelets, and a can of Pringles. You can use any design you want, of course, but Here is the link to these fine Newt Kaiju tattoo designs.
If your nylons have an undies part, cut the legs off and wear the undies on your head for the rest of the tutorial, if desired. Put the legs on your arm like so, and cut the toes off so you can slip your hand through. You can cut some of the top of the sleeve off as well, but don’t cut too much because you can’t put it back on if your sleeves are too short.
Here are my creepy sleeves. Now for the pringles.
Tape your design template to the Pringles can. It doesn’t reach all the way around but eh. The Pringles can gives you a nice stable surface to draw on that is roughly the shape and size of an arm. It’s a little short, so just roll up the rest of the nylon above the workspace and adjust both template and nylon down when you get to working on that part of the sleeve.
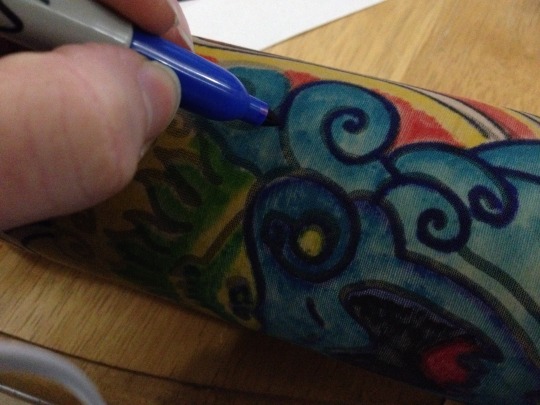
Color with the markers! I recommend doing the colored areas first and then doing the black outlines on top of it, to avoid the black ink contaminating the ink pads of the lighter markers. Remember how that always happens to the yellow ones? Eww. Nylons are thin and slide around a bit, so it’s best to use short strokes and dotting to get the ink on.
Take the template off the Pringles tube, flip the paper to the blank side and put it back on again. The paper collects the extra ink, so it’s hard to see any missed spots. Now you can see any bits you may have missed. Fill them in for completion. Also, the paper doesn’t manage to wrap all the way around the Pringles can, so now is the time to free-hand a bit of the design where the template doesn’t reach. For Newt tattoos, that’s the back of the arm.
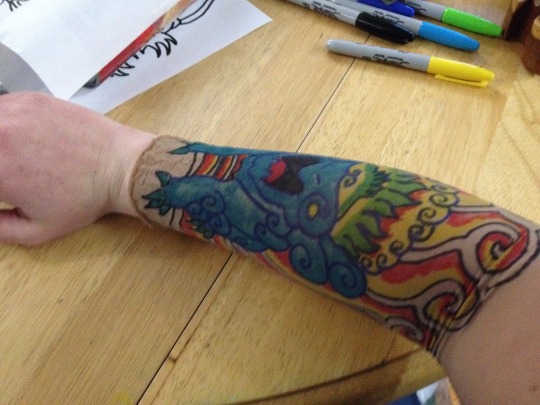
When you’re all done coloring, put them on!
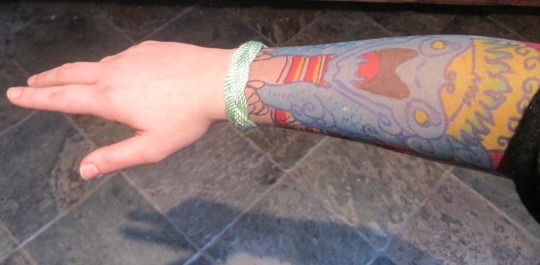
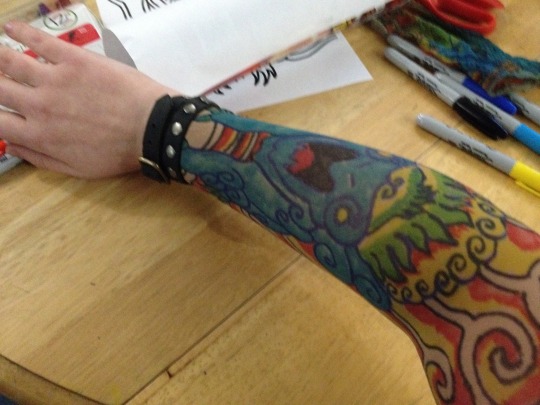
There’s a rough end to the tattoo right at the wrist, of course. Disguise where the sleeve ends and your skin begins with some pretty bracelets:
There we are, much better!
Now…you’re done! Have some Pringles!
SLAMS THE REBLOG BUTTON
from a tattooist perspective: use the navy sharpie not the black or blue for your lines, they will look like healed black ink.
This is amazing. Particularly “if your nylons have an undies part, cut the legs off and wear the undies on your head for the rest of the tutorial, if desired.”